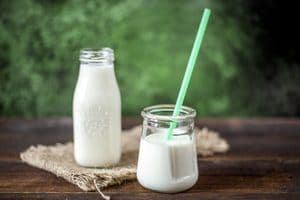
Yogurt is the ideal breakfast accompaniment and is equally good as a late afternoon snack. It has a refreshing taste with a signature sour tinge to it, which tastes great on its own. But it can also be combined with a variety of fruits and vegetables and added in salads.
Yogurt is not just super tasty, but also nutritious. It is a rich source of vitamin B12, which is essential for the metabolism of each cell in the human body, functioning of the nervous system and development of bone marrow, and riboflavin, which is important for cellular respiration.
It’s traditionally been made of cow milk, while goat milk and sheep milk are used in certain cultures and geographies. The type of milk used to make yogurt is responsible for the nuances in taste. For example, the ever popular Greek yogurt is made with ultra-skim milk and is significantly thicker than traditional yogurt. It also has a distinctive sour taste.

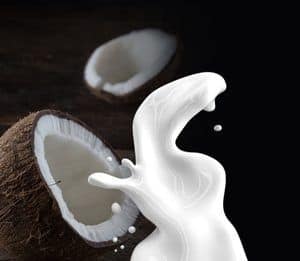
In recent years, plant-based milk such as soy milk and nut-based milk such as almond milk or coconut milk are also being used to make yogurt, targeted at people who are lactose intolerant and vegans. Coconut milk stands apart from the others in this group, because of its rich tastes, which is due to its high oil content (mainly saturated fat). Hence, yogurt made with coconut milk is quite a treat.
Table of Contents
What Type of Coconut Milk to Use?
Organic, high-fat coconut milk is available in most departmental stores in cans and Tetra Paks. If you are buying canned coconut milk check to make sure that can doesn’t have bisphenol A (BPA) lining, which is an industrial chemical. Ideally, avoid canned goods in general. Coconut milk in Tetra Paks are much better.

Alternatively, you could make fresh coconut milk at home. It's very simple.
- 1You will need 2-3 cups of fresh grated coconut, depending on how much coconut milk you require. You will also require water at room temperature.
- 2Transfer the grated coconut into a blender and add about one cup or 250 ml of water in it.
- 3Blend this at high setting till the coconut is finely grounded.
- 4Pour the ground coconut on a muslin cloth or a sieve and collect the thick, first extract of coconut milk in a bowl.
- 5The first extract can't be boiled as it gets curdled. So, you can keep this aside and you use it in a stew or Indian curries.
- 6Now transfer the coconut residue back into the blender and add one-and-a-half cup or 375 ml of water in it, then blend it.
- 7Just like the previous time, pour the grounded coconut in a muslin cloth and collect the thinner second extract of coconut milk in a bowl.
- 8This is the one you will use to make yogurt.
Process of Making Coconut Yogurt
So, now that you have either full-fat coconut milk free of additives or fresh homemade coconut milk, we can proceed to make yogurt. You will need 1 liter of coconut milk for this recipe. In case you want to make more yogurt or less yogurt, then adjust the amounts in proportion. You will require some type of yogurt starter culture, which will deliver the fermentation bacteria in the milk. If you are lactose intolerant or vegan, use a non-dairy starter culture. The best and most hassle-free option is dairy-free probiotic capsules or tablets.

- 1Begin by sterilizing the cups or containers in which the yogurt will be kept, the spoon(s) you will be using to mix ingredients and other utensils that you will be using in the process with boiling water.
- 2Pour the coconut milk in a saucepan and bring the heat up to 180 degrees Fahrenheit. You need to be careful about not allowing the milk to boil as that would spoil it. Use a cooking thermometer to keep a track of the temperature and as soon as it reaches 180 degrees, turn off the heat.
- 3While the milk is still hot mix gelatin or agar-agar into it. These will work as thickening agents. Start by mixing a small amount and continue adding more gelatin or agar-agar in small increments till the consistency is to your liking.
- 4Now that the milk has a nice consistency to it, add raw honey or maple syrup. Make sure that it mixes in nicely. It essentially acts as food for the starter culture you will shortly introduce in the milk. However, before that you need to allow the milk to cool down to about 100 degrees, or else the culture will not be able to survive. Use the thermometer once again to ensure that the milk has cooled down to the appropriate level.
- 5In case you use probiotics, the sweetener isn’t essential but neither is it harmful. It simply adds to the final taste.
- 6Separate about half a cup of cooled milk from the saucepan and in this cup add three probiotic capsules or starter culture, whichever you prefer. Continue stirring it will the starter culture has mixed well with the milk.
- 7While selecting the probiotics make sure that it has some of these - Bifidobacterium bifidum, Lactobacillus acidophilus, or Streptococcus thermophilus.
- 8Pour this half a cup of milk and starter culture back into the original batch and mix it thoroughly.
- 9In the final stretch of the process, you have to pour the cultured coconut milk into the cup or containers you had sterilized earlier. Cover the containers and let it ferment at about 110 degrees for a minimum of seven hours and up to nine hours. You can leave the containers in the oven or you can use a yogurt maker. More on that later.
- 10At the end of seven hours, you need to stop to check the taste. If you want the yogurt to be lean more towards the sour end and less towards the sweet end, then you let it ferment a little longer.
- 11When you are happy with the taste, give it a thorough stir to ensure that there are no lumps and the consistency is thick and smooth. At this stage you can add chunks of fruit if you want. Refrigerate the containers for at least six hours.
- 12If you want an even thicker consistency such as in Greek yogurt, then transfer the coconut into a cheesecloth and let it drip over a bowl. You can leave it overnight if you please.

Yogurt Makers
You can use a yogurt maker for the part when the cultured coconut milk is fermenting. The yogurt maker that we use at home essentially mimics the technique used commercially to make yogurt. It ensures that the cultured coconut milk stays at a steady temperature, without you having to monitor the process.
Just like all other home appliances, there’s a wide range of yogurt makers available in the market. Some of the top-of-the-line yogurt makers provide containers along with the machine. These machines also provide features such as timers, temperature control, digital displays, and auto-shut downs. There are Greek yogurt makers designed specifically for making Greek yogurt, and even frozen yogurt makers to make a summer time treat.
The Euro Cuisine YMX650 Yogurt Maker is one of the best that’s currently available in the market. You get seven 6-ounce glasses with date setting lids along with the machine. In addition, the YMX650 let’s you set a timer for up to 15 hours and it automatically shuts down when the set time is up. This yogurt maker is also completely BPA-free and comes with 3-year warranty.
Conclusion
Coconut yogurt is light, creamy and fresh. It can be eaten with a variety of food items and at different times of the day. If you make homemade coconut yogurt, then experiment with various things like honey, and vanilla to add an extra layer of taste to it. However, do remember that once a batch of yogurt has been made, you should refrigerate it and eat it within two weeks. After two weeks, it’s time to make a new batch of coconut yogurt.
